Why Getting Lawn Edging for Gravel Right Matters
Lawn edging for gravel keeps your stones where they belong — and your grass where it belongs.
Here’s a quick look at how to choose and install gravel edging:
- Choose your material — metal, plastic, concrete, or stone
- Mark your layout — use a garden hose or marking paint to outline the edge
- Dig a shallow trench — 2 to 3 inches deep is enough for most edging types
- Add a sand base — for stability and easy leveling
- Install the edging — secure with stakes or spikes
- Backfill and compact — press soil against the edging to lock it in place
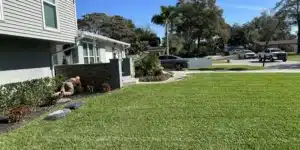
Without a defined border, gravel migrates onto your lawn, grass creeps into your gravel, and your yard quickly starts to look untidy. In Florida’s climate — with heavy rain and fast-growing grass — that process happens faster than you’d expect.
Good edging solves this. It gives your landscape a clean, finished look while protecting both your gravel area and your turf from each other.
I’m Tyler Wilson, owner of Copperhead Lawn Care, and through years of hands-on property maintenance work across Lutz and the Tampa Bay area, I’ve seen how the right lawn edging for gravel can completely transform a yard’s curb appeal. Let’s walk through everything you need to know to get it done right.

Why You Need Lawn Edging for Gravel

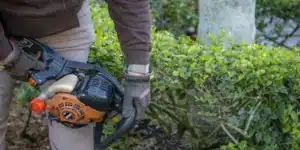
If you’ve ever tried to mow a lawn that sits right next to a loose gravel path, you know the “ping” sound of a stone hitting your mower blade. It’s not just annoying; it’s dangerous. Proper lawn edging for gravel acts as a physical barrier that serves several critical purposes for your Lutz or Zephyrhills property.
First, let’s talk about weed and grass invasion. Florida’s St. Augustine and Bahia grasses are aggressive. They spread via runners (stolons), and without a deep enough border, they will find their way into your beautiful gravel driveway or walkway in a heartbeat. Once grass takes root in gravel, it is incredibly difficult to remove without making a mess of your stones.
Beyond the “turf war,” edging provides essential drainage control. During our heavy summer downpours in Land O’ Lakes, uncontained gravel can simply wash away into your lawn or down the street. A sturdy border keeps the stones in place, ensuring your investment stays where you put it.
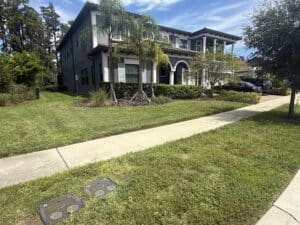
Finally, there is the matter of lawn definition and aesthetics. A crisp line between a green lawn and a textured stone path creates an immediate boost in curb appeal. It makes your landscape look intentional and professionally maintained. If you’re debating whether to use rocks or mulch for your borders, check out our guide on Everything You Need To Know About Mulching Vs Rocking to see which fits your maintenance style best.
Popular Materials for Borders
Choosing the right material is the most important decision you’ll make for this project. In our experience working across Florida, the humidity and heat mean that some materials last much longer than others.
| Material Type | Pros | Cons | Best Use |
|---|---|---|---|
| Galvanized Steel | Extremely durable, very thin profile, rust-resistant | Can be heavy to handle | High-end driveways and clean lines |
| Recycled Plastic | Affordable, easy to install, won’t rot or rust | Can shift if not spiked properly | Curved garden paths and DIY projects |
| Concrete Pavers | Permanent, classic look, very heavy | Requires more digging and leveling | Traditional home styles and flower beds |
| Natural Stone | Beautiful, unique, lasts forever | Harder to get a perfectly straight line | Organic, rustic landscapes |
Each of these materials has a place in the Florida landscape. Whether you want something that disappears into the grass or something that stands out as an architectural feature, there is a lawn edging for gravel solution for you. To learn more about the differences between these materials, you can read our deep dive into Everything You Need To Know About Mulching Vs Rocking.
Durable Metal and Plastic Lawn Edging for Gravel
For those who want a low-profile look, metal and plastic are the go-to choices. Modern aluminum alloy edging is a professional favorite because it’s flexible enough to follow the curves of a winding path but strong enough to hold back the weight of a gravel driveway. High-grade aluminum doesn’t rust, which is a huge plus in our humid Lutz climate.
Plastic edging has come a long way as well. We often see “no-dig” kits that are popular for DIYers. These kits usually feature an L-shaped profile that sits on top of the ground and is secured with heavy-duty spikes. When choosing plastic, look for UV-resistant materials. The Florida sun is brutal on cheap plastics, causing them to become brittle and crack within a year. Quality recycled plastic options offer a great balance of flexibility and longevity.
Many of these systems feature interlocking connectors. This is vital for gravel containment because any gap in the edging is an invitation for stones to escape and weeds to enter. A seamless connection ensures a continuous, solid barrier.
Architectural Stone and Brick Lawn Edging for Gravel
If you want your edging to be a design statement, stone and brick are the way to go. Concrete edging stones, like tumbled “river rock” styles or classic Belgian blocks, add a weight and permanence to the landscape that plastic just can’t match.
These materials are excellent for matching the architectural style of your home. A Colonial-style home in Zephyrhills looks fantastic with brick borders, while a more modern build in Land O’ Lakes might benefit from the clean, grey lines of concrete pavers.
One unique benefit of concrete and stone is their weight. Once they are set in a trench with a proper base, they aren’t going anywhere. They provide a “mow strip” — a flat surface where you can run your mower’s wheels, allowing you to cut the grass right up to the edge without needing a string trimmer. For those looking for the best local supplies, we’ve rounded up The Best Places For Landscaping Rocks In Wesley Chapel and the surrounding areas to help you find the perfect match.
Step-by-Step Installation Guide
Ready to get your hands dirty? Installing lawn edging for gravel is a project most homeowners can tackle in a weekend, but it does require some sweat equity to do correctly.
1. Mark Your Layout Don’t just start digging. Use a bright-colored marking paint or a flexible garden hose to visualize the edge. If you have curves, a hose is great because you can adjust the “flow” of the line until it looks perfect.
2. Safety First: The Utility Check In Florida, many of our utility lines are buried shallow. Before you put a shovel in the ground, call 811. Even a 3-inch trench can hit a stray cable or irrigation line if you aren’t careful.
3. Dig the Trench For most stone or brick edging, you’ll want a trench about 2 to 3 inches deep and slightly wider than your material. If you’re using thin metal or plastic “pound-in” edging, you might only need a very narrow slit in the soil.
4. Lay Geotextile Fabric This is a step many people skip, and they usually regret it. Laying a woven geotextile fabric at the bottom of your trench (and extending it under your gravel area) prevents the gravel from sinking into the Florida sand over time. It also adds an extra layer of protection against weeds.
5. Add and Compact the Base Put down about an inch of leveling sand or crushed stone base. Use a hand tamper to compact it until it’s firm. This prevents your edging from sagging or shifting when the ground gets saturated during a rainstorm.
6. Install the Edging Place your stones, bricks, or metal strips. Use a level to make sure everything is even. For metal or plastic, drive your spikes in at an angle for maximum “bite” into the soil. For stone, use a rubber mallet to tap the pieces into the sand base until they are snug.
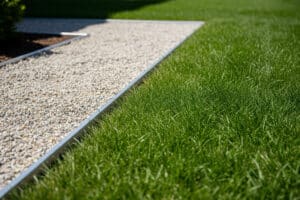
7. Backfill and Finish Fill in any gaps behind the edging with the soil you dug out earlier. Pack it down tightly. On the other side, bring your gravel up to the edge. For a professional finish, ensure the gravel is about an inch lower than the top of the edging to prevent “spillover.”
For more detailed tips on the digging process, see our guide on How To Install Flower Bed Edging Like A Pro.
Essential Tools and Maintenance Tips
To get professional results, you need the right tools. Here is what we keep in our trucks for these types of jobs:
- Rubber Mallet: Essential for tapping stones into place without cracking them.
- Marking Paint: For “drawing” your lines before you dig.
- Leveling Sand: To create a flat, stable foundation.
- Square Shovel: Better for creating clean, vertical trench walls than a pointed shovel.
- Hand Tamper: For compacting the base and backfill.
Once your lawn edging for gravel is installed, it doesn’t mean you’re done forever. Maintenance is the key to keeping that “just installed” look.
In Lutz and Land O’ Lakes, our sandy soil likes to shift. Once a year, take a walk along your edging. If any stones have sunk or metal strips have popped up (often due to tree roots or heavy rain), take a few minutes to reset them.
You should also plan on yearly re-grading of your gravel. Over time, walking or driving on gravel creates low spots. Raking the gravel back to a level surface helps maintain the pressure against the edging, which actually helps hold the border in place. If you’re dealing with weeds, a quick spray of vinegar or a specialized weed preventer can keep your gravel looking pristine. You can find more maintenance advice in our article on Mulching Rocking.
Frequently Asked Questions about Gravel Edging
How deep should the edging be installed?
For standard lawn-to-gravel separation, 2 to 3 inches is the sweet spot. This is deep enough to discourage grass roots from diving under the border, but shallow enough that you won’t struggle with massive excavation. If you are edging a driveway that handles heavy vehicle traffic, you may need to go deeper (up to 6 inches) to ensure the border doesn’t “roll” under the weight of a car.
Does edging prevent grass from growing into gravel?
It significantly slows it down, but it’s not a 100% guarantee. Most grass in our area spreads through runners. A physical border forces those runners to either go over the top (where you can see and trim them) or try to go deep underneath. Using edging in combination with a high-quality weed barrier fabric is your best defense.
Can I mow directly over the edging?
Yes, if you choose the right material and install it at the correct height! Metal edging and certain low-profile plastic borders are designed to sit almost flush with the soil, allowing your mower blades to pass safely over them. If you’re using stone or brick, make sure the top of the stone is no more than an inch above the grass height, or better yet, level with it.
Conclusion
Installing the right lawn edging for gravel is one of the best ways to protect your landscaping investment and keep your property looking sharp. Whether you go with the sleek look of aluminum or the timeless appeal of concrete stone, the goal is the same: containment, protection, and beauty.
At Copperhead Property Maintenance, we know that homeowners in Lutz, Land O’ Lakes, and Zephyrhills take pride in their yards. We’re here to help you achieve that professional look, whether you’re looking for advice on a DIY project or need a hand with your monthly property maintenance.
A well-edged yard isn’t just about the stones; it’s about the peace of mind that comes with a clean, manageable landscape. If you’re ready to take your garden beds to the next level after finishing your gravel paths, check out our pro tips on How To Install Flower Bed Edging Like A Pro. Keep those stones in their place, and enjoy your beautiful Florida outdoors!